Assisted Culling is the official name
Lightroom calls the feature Assisted Culling, although photographers often search for it as Lightroom AI culling. In June 2026 it moved out of Early Access and became generally available. Lightroom Classic 15.4 also added the Faces panel, which shows per-face Eye Sharpness and Eye Open scores for people-focused review.
For wildlife photographers, that update does not change the basic rule: let Lightroom reduce repetitive sorting, then make the final call yourself. Wing position, head angle, catchlight, gesture and background still need a human eye.
Turn on Assisted Culling in Lightroom Classic
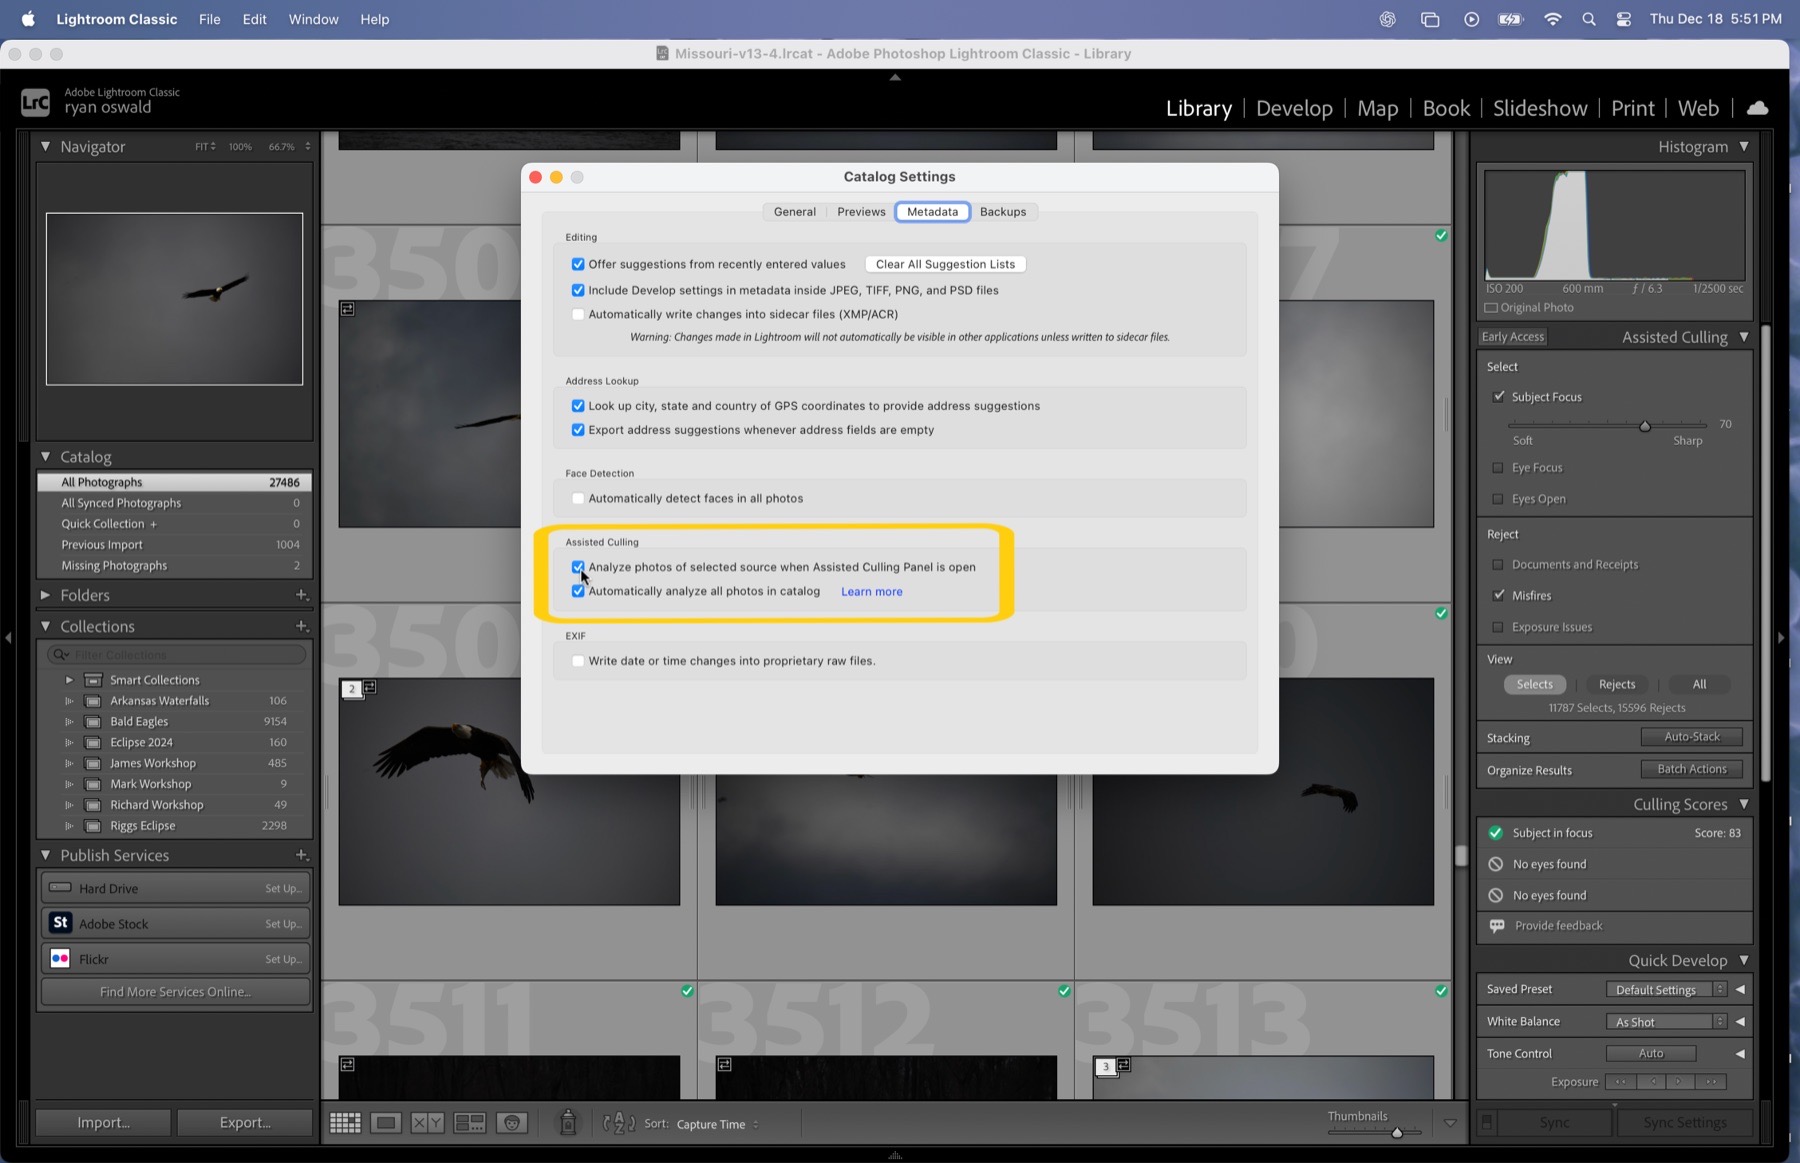
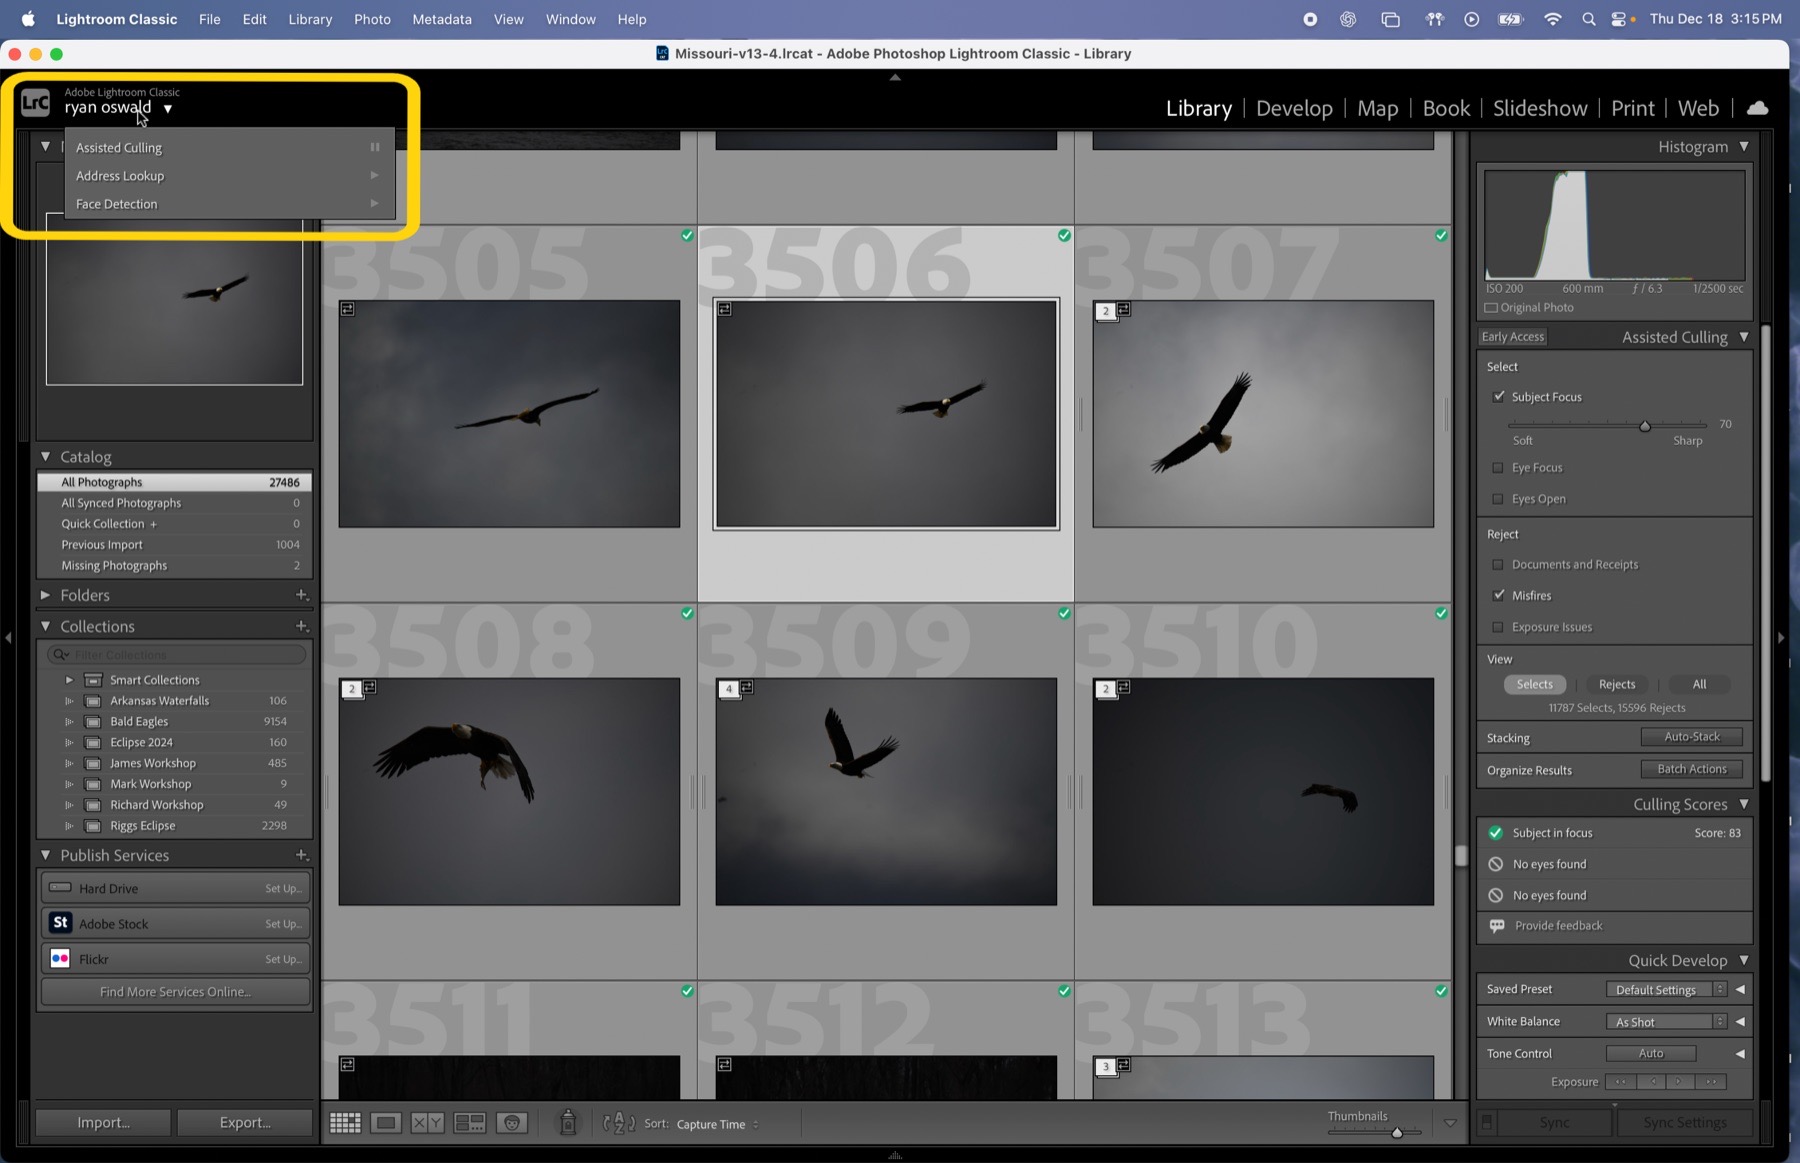
Enable the feature from Catalog Settings → Metadata → Assisted Culling. You can also open the Identity Plate menu and turn on Auto Analysis. Assisted Culling appears in the Library module and is available in the Import dialog.
During import, choose the source folder, open Assisted Culling and let Lightroom analyze before choosing Select and Reject criteria. After import, select a folder or collection in Library, wait for analysis to finish and make the same choices in the Assisted Culling panel.
I prefer culling after import. The photographs are already safely in the catalog, the grid is easier to review and I am less likely to move too fast and exclude a frame I would have kept.
Use wildlife criteria as a first pass filter
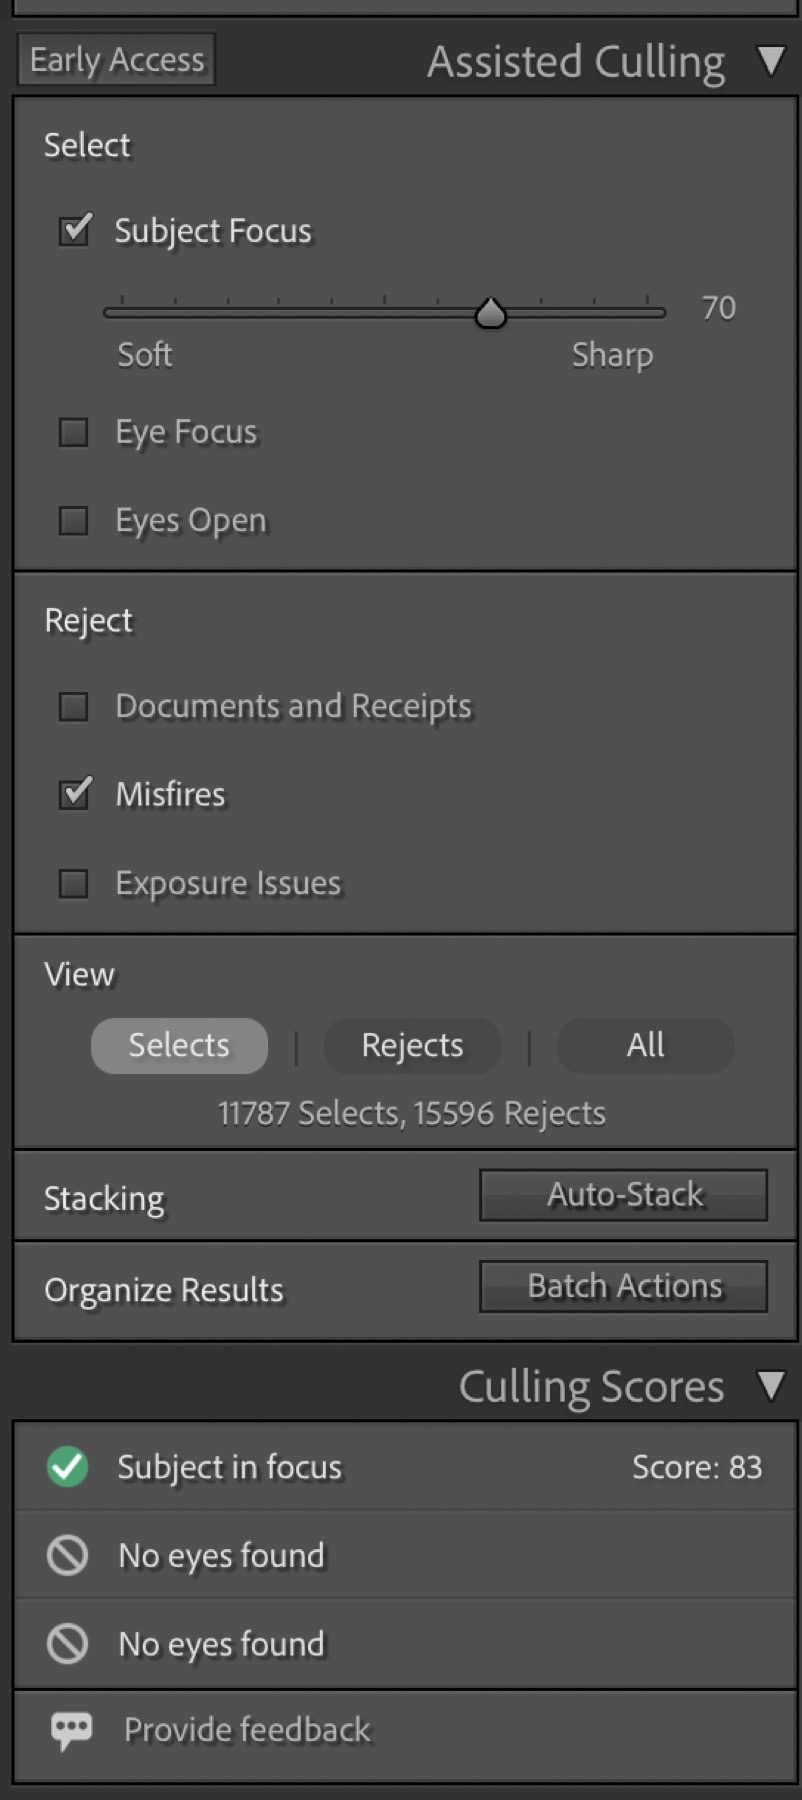
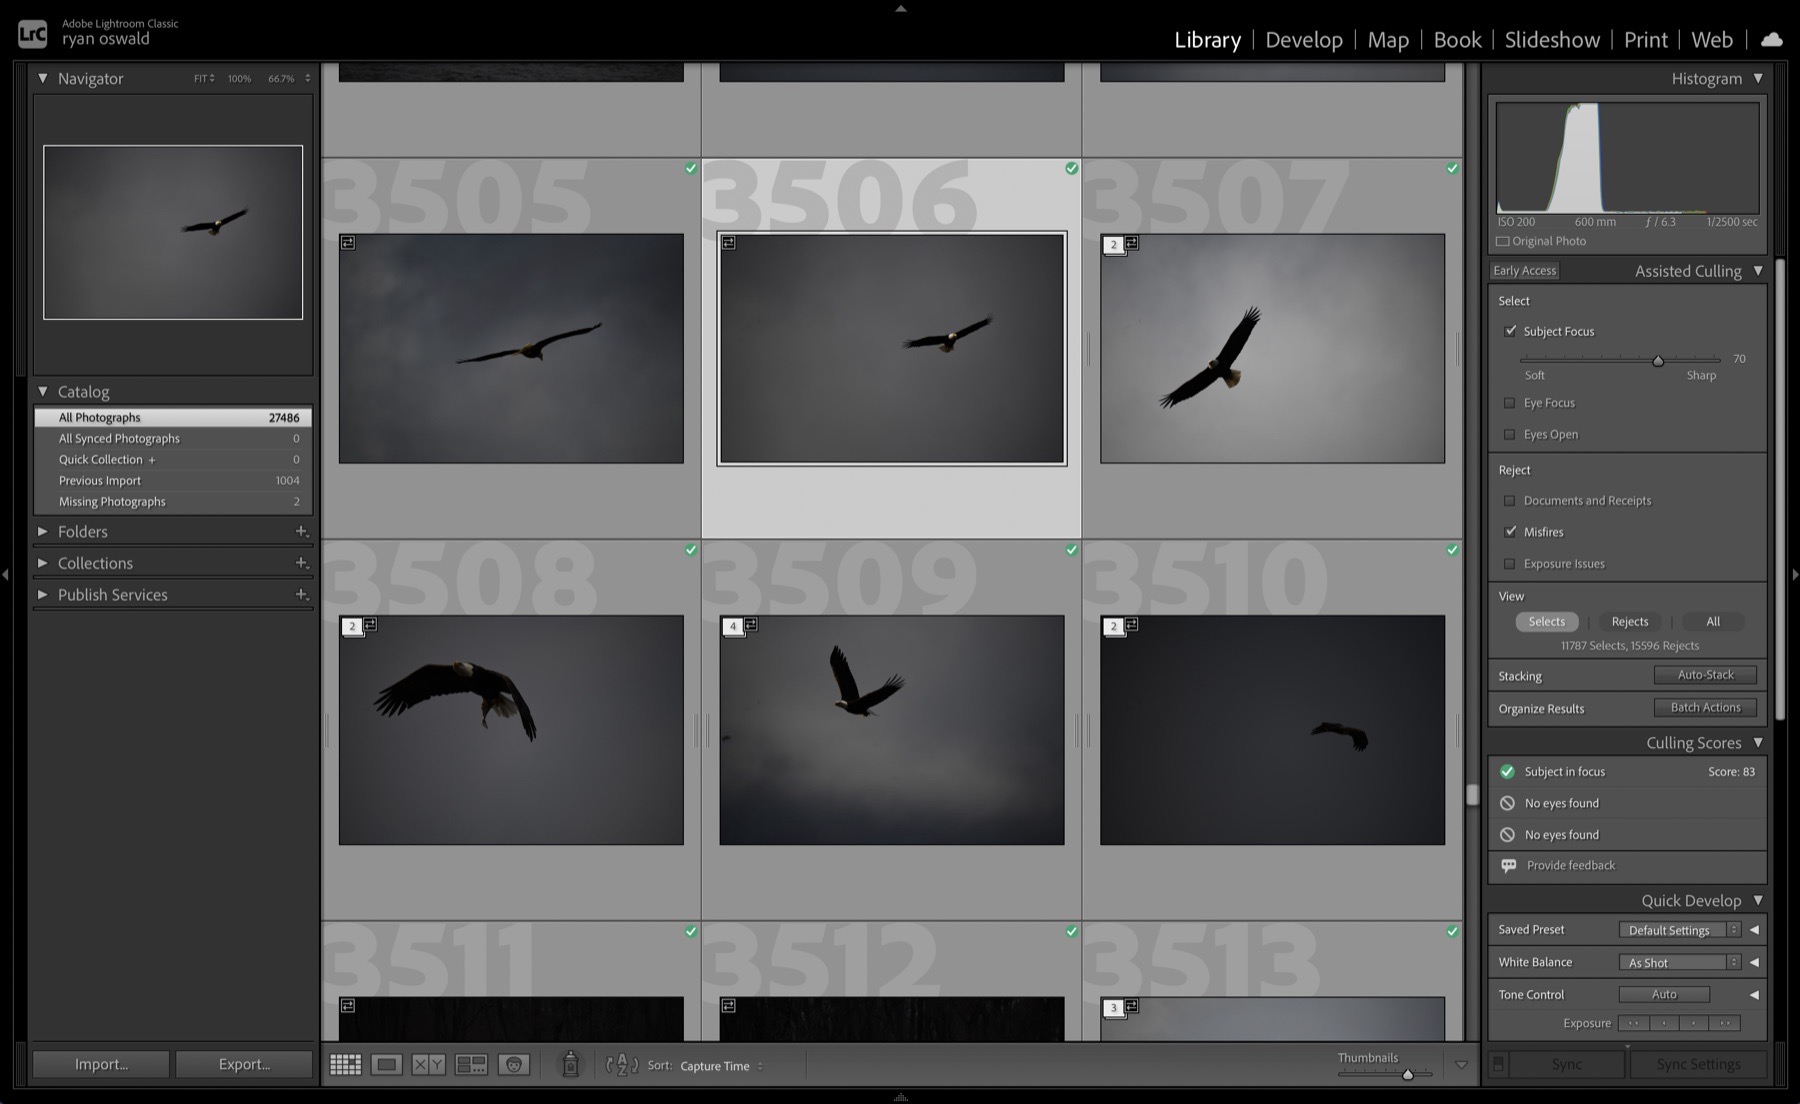
For bald eagle photographs, I start with Subject Focus. Move the threshold until obviously soft frames begin to drop out, then stop before it starts rejecting photographs with deliberate motion or shallow depth of field.
I also turn on Misfires and Exposure Issues for obvious technical failures, then scan the Rejects view before removing anything. If a good frame is being rejected, back off the setting or override the result.
Treat Eye Focus, Eyes Open and the Faces panel cautiously with wildlife. Lightroom Classic 15.4's face tools are built for people and a bird's eye, head angle or partially hidden face may not score the way you expect. They can be useful signals, but I do not let them decide which eagle photograph survives.
Auto Stack turns a burst into one decision
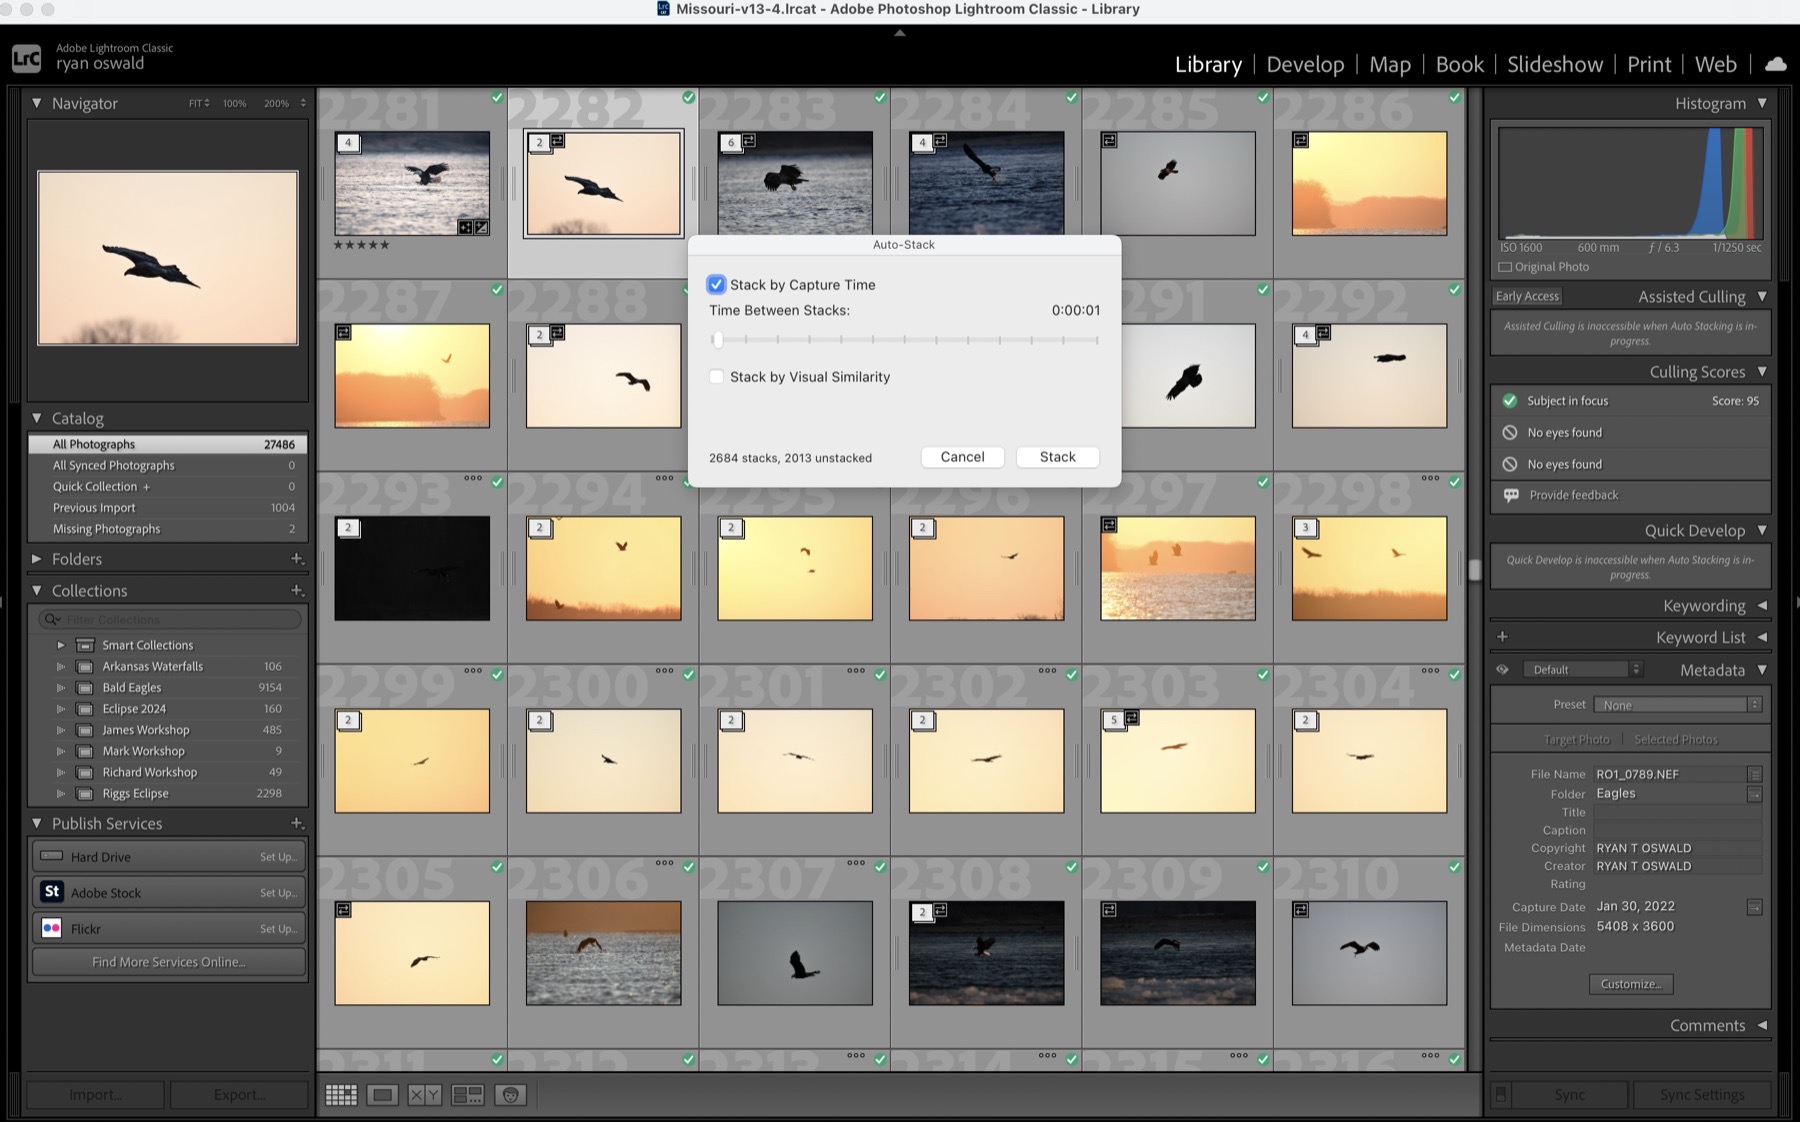
Once the obvious failures are separated, stack similar frames before you judge wing position. Lightroom can group photographs by time and visual similarity, which turns a long eagle burst into a smaller set of sequences.
For bald eagle bursts, I usually start Auto Stack with a one-second capture time interval and adjust from there. If separate passes collapse into one stack, shorten it. If one burst stays split across several stacks, lengthen it.
Stacking is where the time savings become real. Instead of comparing 200 frames as one wall of thumbnails, open one sequence, pick its best three to five frames and move on.
Use a three pass review
My Lightroom workflow is intentionally short: remove technical failures, stack related sequences, then make the human pass.
Automated tools reward technical clarity. A blurred wing, unusual crop or quieter frame may still carry more energy. Keep any photograph that feels different long enough to make that decision yourself.
Only after the selects are tight do I start editing. Adaptive Color can speed up the first tonal decision, while the complete Bald Eagle Photography guide helps improve the field setup that creates cleaner bursts before culling begins.
- Pass 1: Remove technical failures. Use Subject Focus, Misfires and Exposure Issues to surface soft frames, accidents and unusable exposure problems. Review every Reject before deleting anything.
- Pass 2: Stack sequences. Group each burst so you compare one fishing pass or takeoff at a time.
- Pass 3: Choose the photograph. Judge eye sharpness, head angle, wing shape, catchlight, background, gesture and story. Keep a second frame only when it says something different.
Frequently asked questions
What is Lightroom Assisted Culling?
Assisted Culling is Lightroom's official name for its AI-powered first pass. It analyzes the photographs you choose, marks likely Selects and Rejects using your criteria and leaves the final decision with you.
Can I use Assisted Culling for wildlife photography?
Yes. Subject Focus, Misfires, Exposure Issues and Auto Stack can save real time on wildlife bursts. Review the results yourself because the strongest wing position, gesture or storytelling moment is not always the frame with the highest technical score.
Does Assisted Culling delete rejected photographs automatically?
No. It marks and filters likely rejects so you can review them. During import, Lightroom offers a separate Don't Import Rejected Images option, but nothing is excluded unless you choose that setting.
Should I use Assisted Culling during import or afterward?
Both workflows are supported. I prefer using it after import because the files are already in the catalog and I can review the full grid without rushing the import decision.
What Assisted Culling settings should I start with for wildlife?
Start with Subject Focus, Misfires and Exposure Issues. Adjust Subject Focus until obviously soft frames drop out, then inspect Rejects and back off if good images disappear. Treat Eye Focus, Eyes Open and Faces as optional signals for birds.
Can Auto Stack group burst sequences?
Yes. Lightroom can group related images by capture time and visual similarity. For bald eagle bursts, I start with a one-second capture time interval and adjust until each stack represents one clean action sequence.
A useful workflow removes repeated decisions while protecting the choices that make the photograph personal.